Introduction
In the previous post, we launched a Cloud Function in GCP.
Today, let’s look at creating a Kubernetes cluster and deploying Grafana on it. Google calls it’s Kubernetes offering GKE - Google Kubernetes Engine. It is a fully managed service which considerably reduces the operational overhead of maintaining and running a production grade cluster.
Exercise
We will keep this fairly simple. It will involve
- Enable required googleapis to work with -
containerin this case. - Launch the GKE cluster using
gcloudwith a single node in the same zone. - Deploy the latest Grafana image to the newly launched cluster using
kubectl. - Make the deployment accessible over the internet.
- Configure Google Cloud Monitoring as a data source in Grafana.
- Configure a dashboard.
- Cleanup - delete all resources.
Steps
Let’s go through the steps to complete the aforementioned tasks.
1. Enable container API
As last time, the first step of working with any service in GCP is to enable it’s APIs - container for this post.
1$ gcloud services enable container.googleapis.com
In case, you are not sure of the exact name of the api, use this command to fetch the entire list
1$ gcloud services list --available
2. Launch the GKE cluster
The simplest way to launch a GKE cluster is via gcloud. It takes care of a number of defaults for you. The full list of options can be seen here.
1$ gcloud container clusters create tools-k8s --zone us-central1-a --num-nodes=1
We define --num-nodes=1 to limit the pool nodes to 1 (default is 3), --zone us-central1-a to define the zone for the cluster and nodes.
You could also modify the node type (default is n1-standard-1). To get a list of all the valid and available node types in a particular zone, use this command (by defualt it lists this info for every zone) -
1$ gcloud compute machine-types list --filter="zone: (us-central1-a)"
The create command will run for a few mins and by the end of it, you should have a running K8S cluster ready to accept deployments. You can list the cluster to verify (I have modified the MASTER_IP).
1$ gcloud container clusters list
2NAME       LOCATION       MASTER_VERSION    MASTER_IP      MACHINE_TYPE   NODE_VERSION      NUM_NODES  STATUS
3tools-k8s  us-central1-a  1.16.15-gke.4901  192.168.1.1     n1-standard-1  1.16.15-gke.4901  1          RUNNING
3. Deploy Grafana
We can now deploy the latest Grafana image on this cluster using the cli utility kubectl
1$ kubectl create deployment grafana --image=docker.io/grafana/grafana
2deployment.apps/grafana created
Verify that new pods are launched and the deployment is successful -
1$ kubectl get pods
2NAME                       READY   STATUS    RESTARTS   AGE
3grafana-7fb845f455-27tpl   1/1     Running   0          50s
4
5$ kubectl get deployment
6NAME      READY   UP-TO-DATE   AVAILABLE   AGE
7grafana   1/1     1            1           1m30s
4. Enable public access to Grafana
The deployment is successful, however, we can’t access it just yet. Now we have to create a service which will expose this deployment to the world, outside the K8S cluster.
1$ kubectl expose deployment grafana --name=grafana-service --type=loadBalancer --port 80 --target-port 3000
Verify the new service is deployed. It may take a few mins to provide you the public external IP (I have modified the external-IP).
1$ kubectl get service
2NAME              TYPE           CLUSTER-IP       EXTERNAL-IP      PORT(S)        AGE
3grafana-service   LoadBalancer   192.168.1.2      192.168.1.10     80:30447/TCP   2m
Now you can simply hit the external IP shown in the command above to access Grafana.
5. Configure datasource in Grafana
Login using the default Grafana creds (admin:admin) and navigate to the datasources section. Here, click add on Google Cloud Monitoring. On the config screen, select “Service Account” for authentication. Click “Save & Test”.

We are running Grafana on GKE, using a service account which has full access to monitoring API so no additional steps are needed. If you get an error, verify that the service account has read access to monitoring API.
6. Configure a dashboard in Grafana
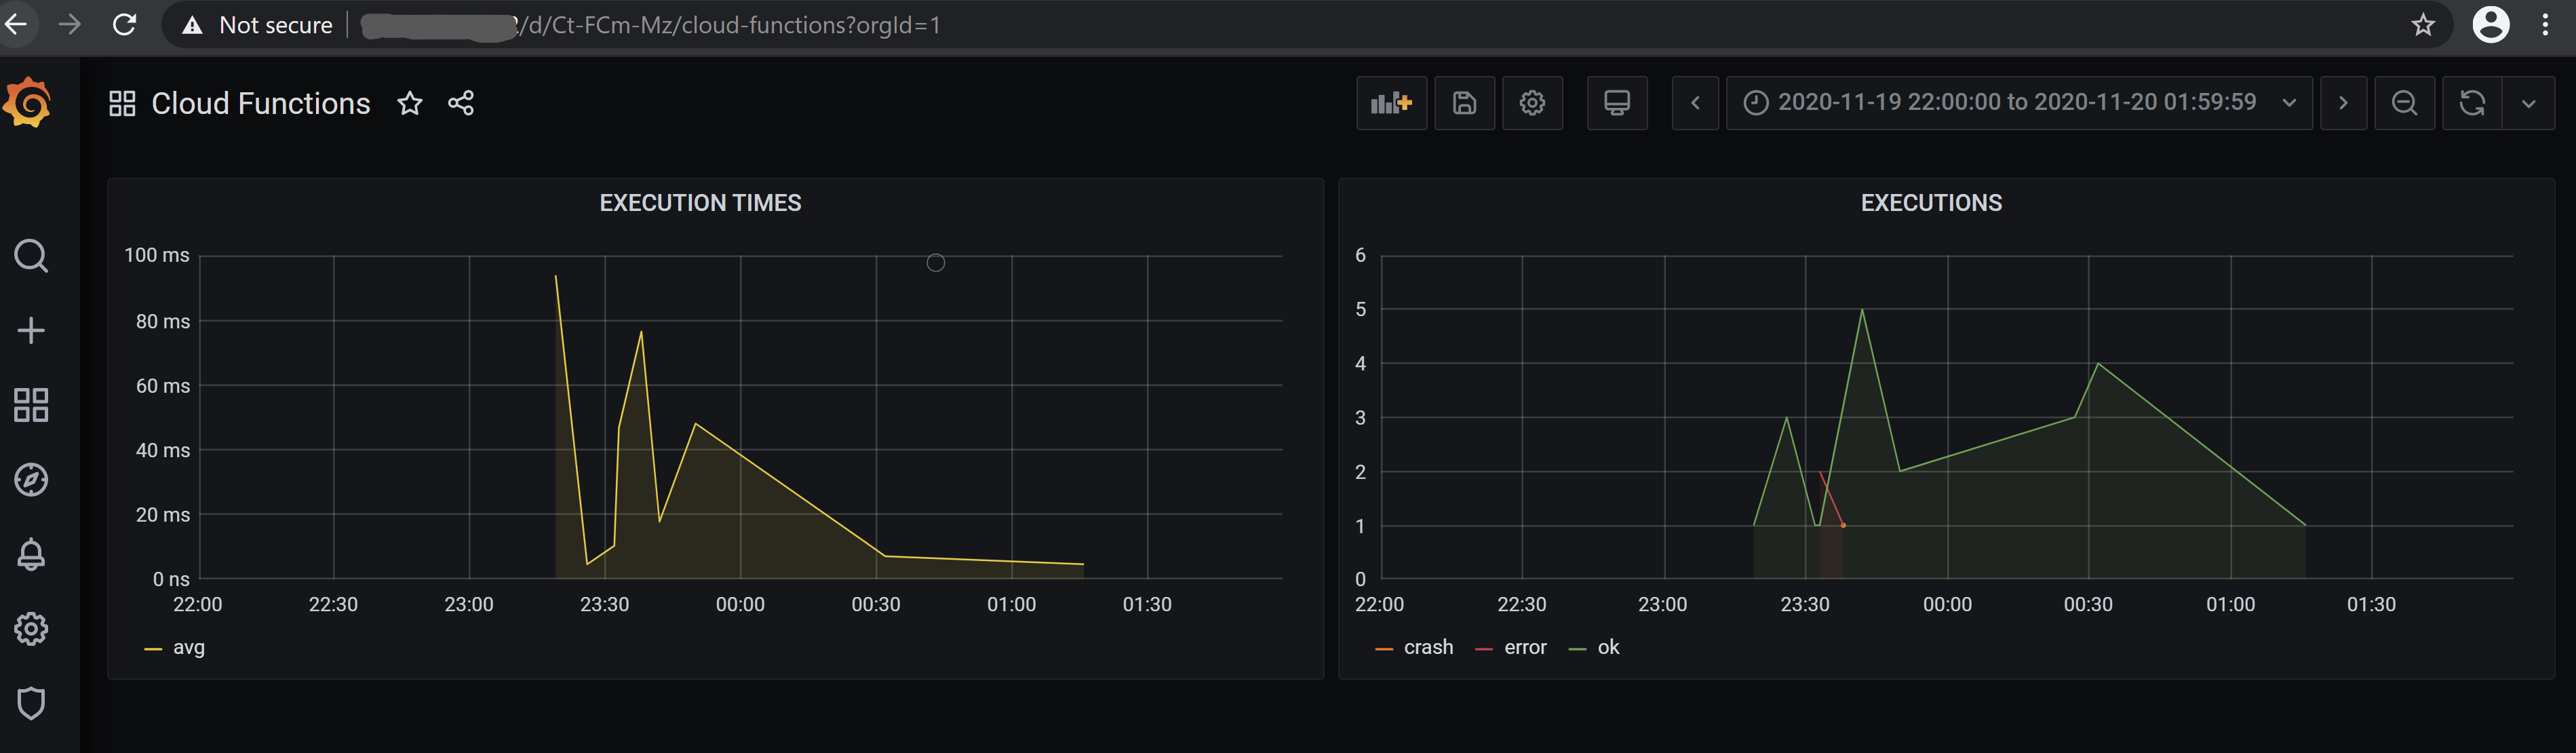
Now that we have a datasource added, let’s configure a dashboard in Grafana. We will plot the successful/failed/crashed invocations of the cloud funtion we created in the previous post. It is pretty straight forward and queries are exactly the same as what you would confiure in the Google monitoring console.
Here is the final result -
7. Cleanup
Delete the service. It may take a few mins.
1$ kubectl delete service grafana-service
2service "grafana-service" deleted
Delete the cluster. Enter ‘Y’ at the prompt, this will also take a few mins.
1$ gcloud container clusters delete tools-k8s --zone us-central1-a
2The following clusters will be deleted.
3- [tools-k8s] in [us-central1-a]
4
5Do you want to continue (Y/n)?  Y
6
7Deleting cluster tools-k8s...done.
8Deleted [https://container.googleapis.com/v1/projects/tools-202011/zones/us-central1-a/clusters/tools-k8s].
Conclusion
GKE is a fully managed Kubernetes offering from Google Cloud which makes it incredibly simple to deploy your app to the cloud. Although this was a very basic example, it can be a good first step to start your GKE journey. We will delve into more complex setups in the future.
Hope this post proves useful, and sets you on the path to exploring more. 👍